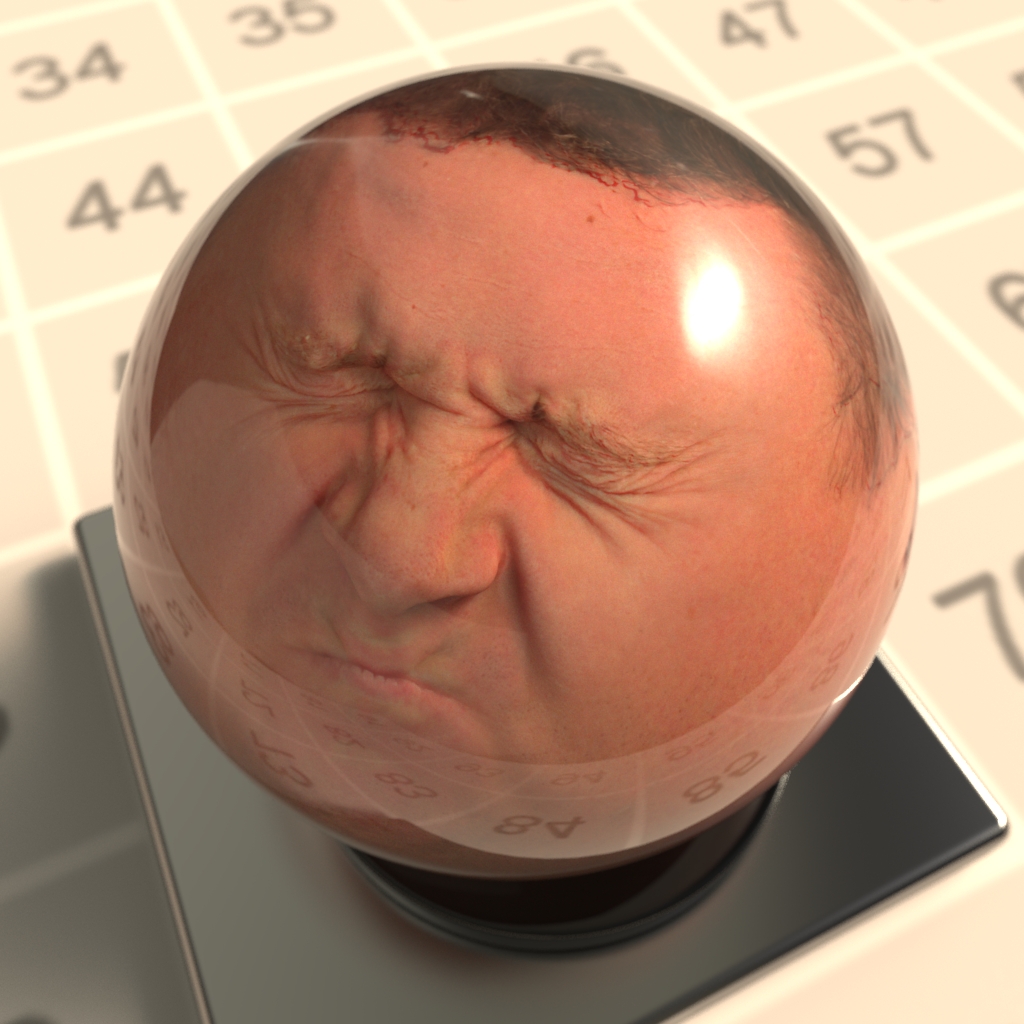
I wanted to test the different SSS types of Anders Langland’s alSurface shader with Arnold. Below you can see the difference when rendering with the SSS modes – Cubic and Directional. I think Directional looks better as it has less of a ‘waxy’ appearance.
Cubic SSSDirectional SSS
And here is a gif which shows more clearly the difference in the SSS types.
After admiring Maya 2016’s new cleaner look recently, I realised there is a lot of wasted space at the top of the attribute editor. I was thinking it could do with a rethink/ redesign considering its pretty much been like this since version 1. Any thoughts? Am I completely insane?
The proposed layout below. Shift the buttons to the top menu making space for preview icon on the left.
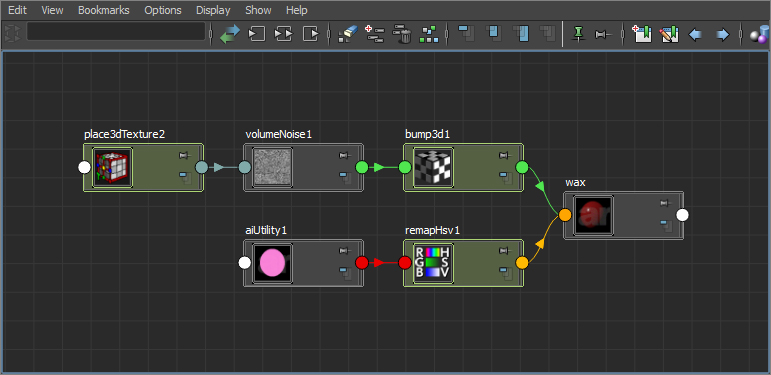
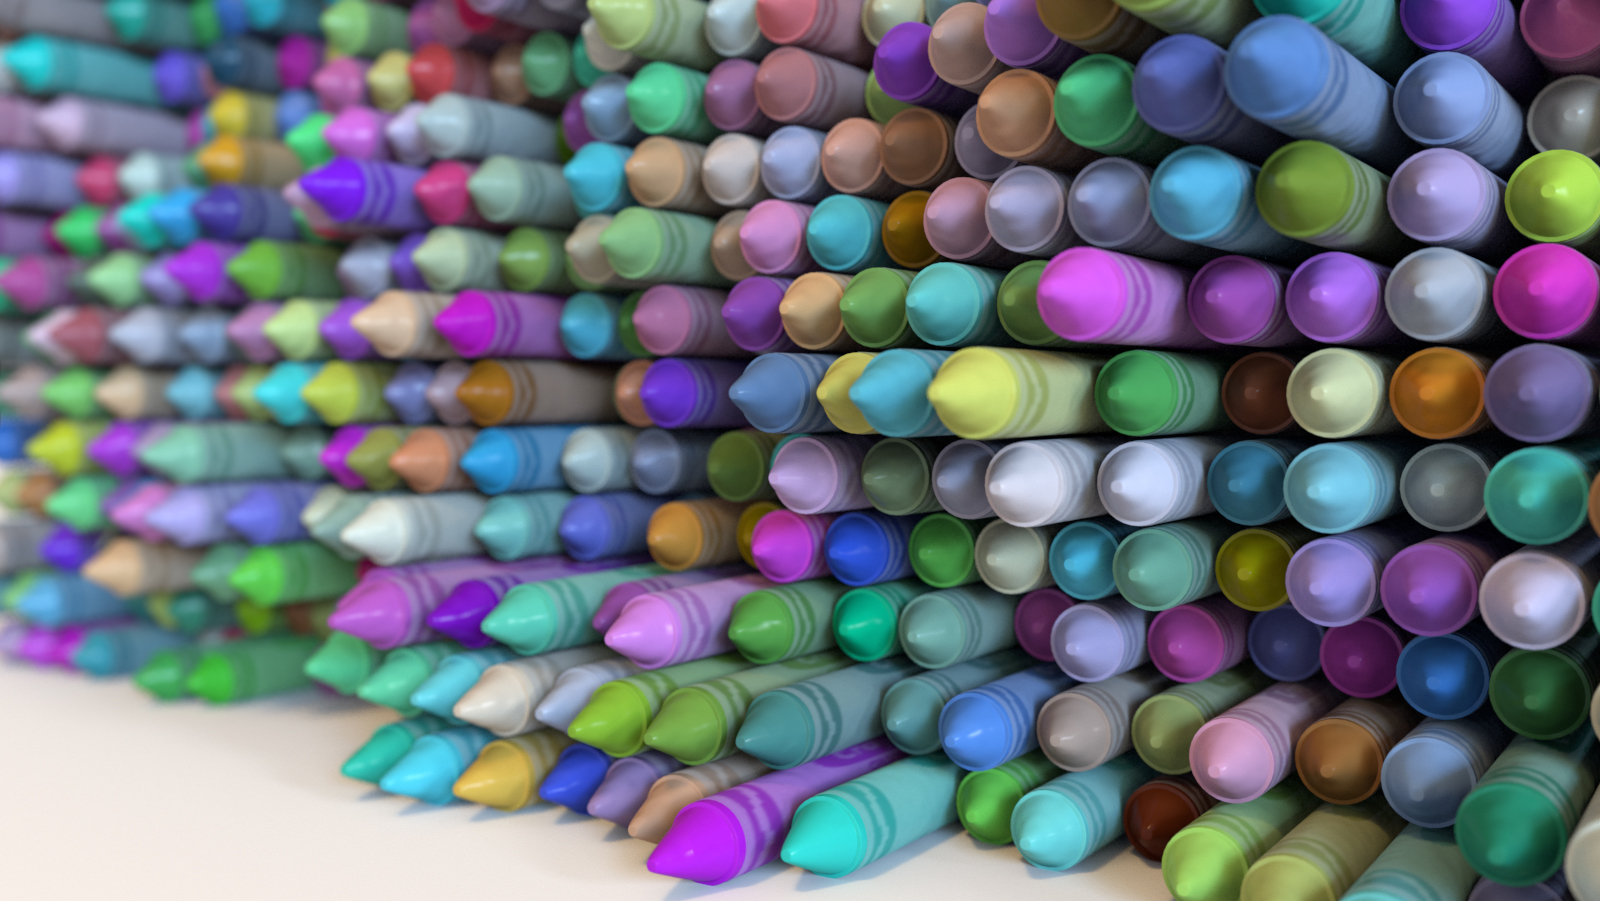
I wanted to tint the color of the paper covering of some wax crayons. So, how to do this without having multiple colored paper textures for each wax crayon? The alLayerColor shader from the very cool alshaders by Anders Langland in combination with the Ai Utility shader is perfect for this kind of thing.
By setting the Color Mode of the Ai Utility to ‘Object’ each of the crayons will be randomly tinted because Object mode uses the name of the shapes to compute the color. Ensure that the ‘Shade Mode’ is set to flat as we don’t want any shading effect from the Ai Utility shader as the alSurface shader is being used for the wax and paper.
‘Shade Mode’ set to ‘flat’ and ‘Color Mode’ set to ‘Object’.
The Ai Utility and the grey paper.jpg texture are combined using the alLayerColor shader:
Paper.jpg layered with Utility shader using alLayerColor connected to Color of alSurface ‘Paper’ shaderalLayerColor connected to Diffuse Color of paper. Mode set to ‘Color Dodge’.Grey paper texture without alLayerColorGrey paper texture layered with Ai Utility using alLayerColor shader
The same Ai Utility shader is also used to alter the Diffuse Color and SSS of the wax alSurface shader.
Ai Utility driving the ‘Diffuse Color’ and ‘SSS’ color of the wax shader.


You must be logged in to post a comment.