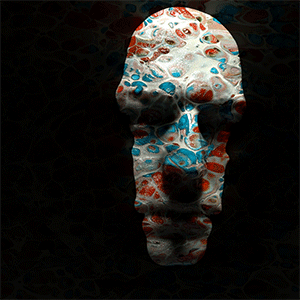
In this tutorial we will explore how to create an abstract, painterly effect applied to a head scan model to produce a ghostly looking portrait. In this tutorial we will specifically use the alSurface shader to produce this effect. Arnold can make use of 3rd party shaders such as the alShaders by Anders Langlands. This collection of shaders will need to be installed prior to starting this tutorial. Further examples using this technique can be found here.
This tutorial makes use of this free head scan, kindly provided by Ten24.info.


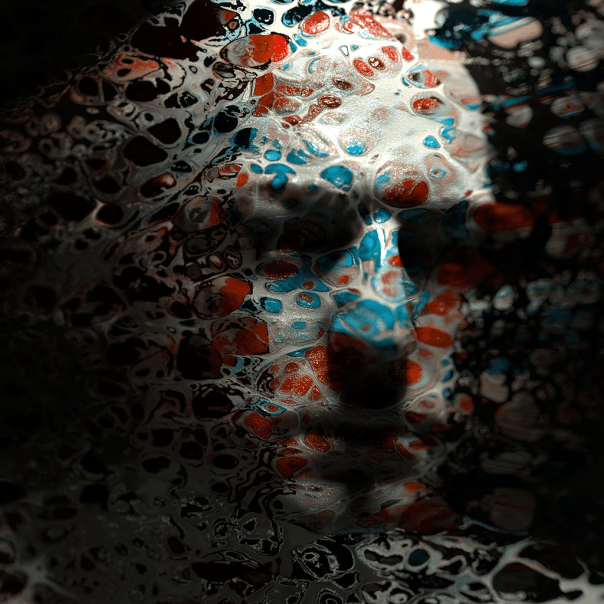
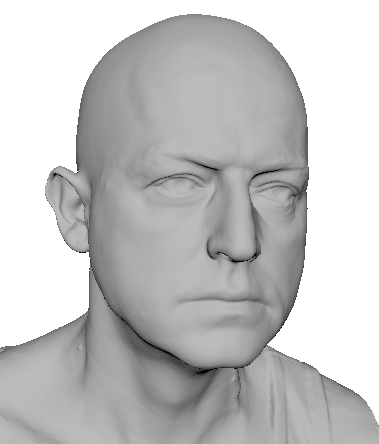
Head
Head Model
- Start off by opening the head scan model Male_Head_L4.OBJ in Maya. Create a new camera and rename it ‘RenderCam’. Position the camera so that it roughly matches the image at the top of the page. We will talk more about careful positioning of the camera later.
Head Shader
- Assign an alSurface shader to the head model. Create a file texture (with projection).
- Open your texture in the file texture. Be aware that some images work better than others. It helps if you use an image with a lot of contrast. It will give more variation in the refraction which will give the effect that the head is distorting and breaking up more.
- Connect the file texture to the following attributes of the alSurface shader.
-
- Diffuse Color
- Opacity
- Specular Color
- SSS Radius Color
- Bump Value


Refractive Plane
- Create a polygon plane and position it so that it intersects the face as in the image below. We will use this plane to refract the rest of the head using the same texture map.

Ensure that you disable ‘Opaque‘ for the polygon plane otherwise the refractive texture will not work correctly.

Poly Plane Normals
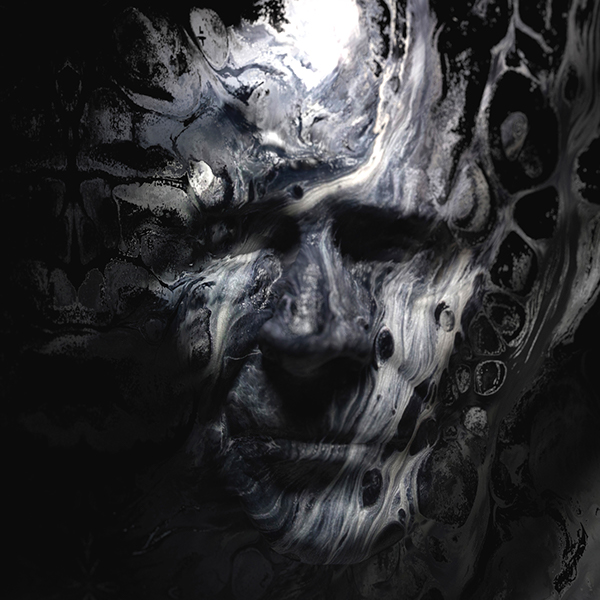
The direction that the the plane is facing in can have a large effect on the rendered result. The images below show the difference when rendering with the normals pointing inwards vs outwards.
 Normals facing outwards (left). Normals facing inwards (right).
Refractive Plane Shader
- Create another alSurface shader and assign it to the plane.
- Connect the same projection texture map used for the head into the Transmission IOR (andBacklightColor) via a Maya remapHSV node.

The refractive plane has same file texture but is connected to Transmission and Backlight Color.

Texture Projections
In most cases setting the Projection Type to Perspective works best for this effect to work. However, it is also possible to get some interesting results by using some of the other texture projection methods.

 Projection Type: None, Ball, Cubic, Spherical.
Remap HSV
You can use a node such as the Remap HSV to give more control over the effect the texture map has on the Transmission IOR. The animation below shows the effect of the Remap HSV ‘Value’ attribute being animated from 1 to 5.

Camera Angle
Careful positioning of the camera should be ensured otherwise the illusion will be broken. This can be seen in the animation below, where the camera has been rotated too far.

Transmission Roughness
Increasing the amount of Transmission Roughness can help to soften the refractive effect. However, increasing this value too much can make the refractive effect appear too soft. Ensure that you have enough Refraction Samples when using Transmission Roughness. In this case a value of 4 was used.

Transmission Roughness: 0, 0.5, 1
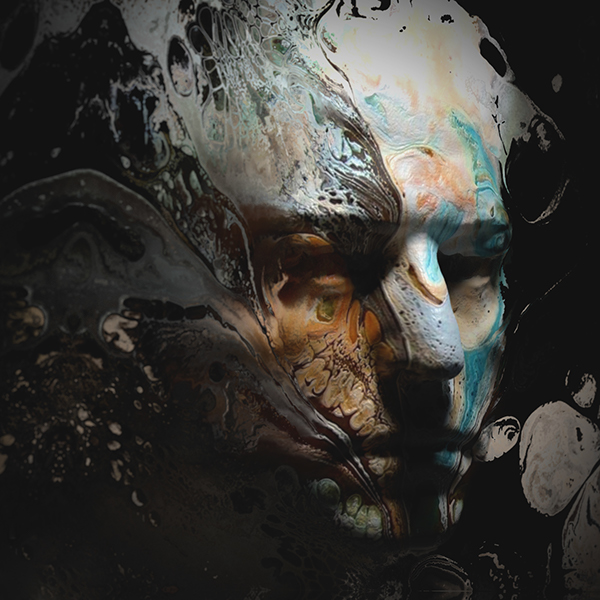
Volume Scattering Color
You could also try adding some Volume Scattering to the scene to add some more integration of the head model with the background texture. Be warned however, that this technique can be prone to noise when using bright light sources and high specular values. This can be minimized by increasing the Specular Roughness for the head shader.

Same projected texture map connected to the Volume Scattering Color


Enabled (left). Disabled (right).
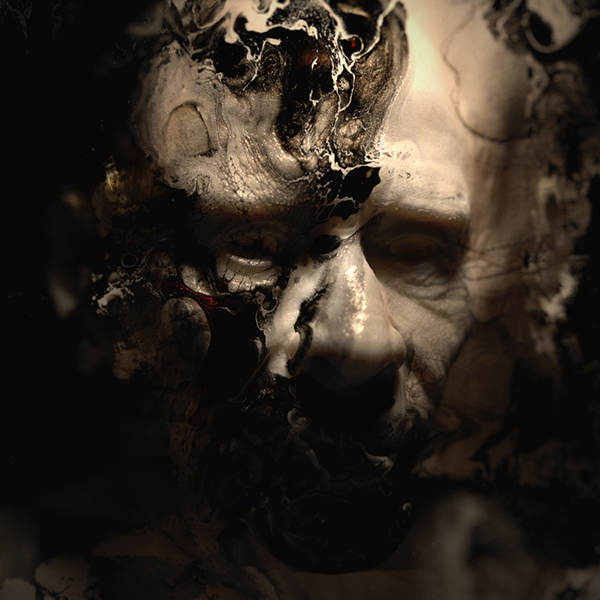
Black and White
Converting the final rendered image to black and white in Photoshop (Image> Adjustments> Black and White) can also yield some interesting results. The images below show some of the effects available.

 Default, High contrast blue filter, Infrared, Maximum White
That concludes this tutorial on how to create an abstract refractive effect using the alSurface shader. You can also try this technique using different shaders and textures to get many interesting effects. The key is to just experiment with it and see what happens. You may be surprised by the results!